


This content contains affiliate links, which helps hangrywoman.com to provide free recipes and resources. Thank you for your support of my blog and non-profit organization, Glucose Guide.
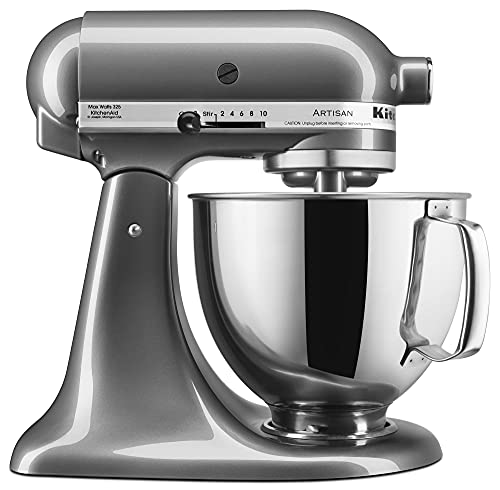
Making butter is a process that used to be done by hand, but now it can easily be done with a stand mixer. All you need is one ingredient – heavy cream!
In this blog post, I will walk you through the steps of making butter in a stand mixer with one ingredient. It’s easy and fun, and you will love the fresh taste of homemade butter!

How to make homemade butter
- Pour heavy cream into the bowl of a stand mixer.
- Turn the mixer on to medium-high speed and beat the cream until it thickens and forms peaks (6-7 speed).
- Continue mixing on high speed (10) until the mixture turns from whipped cream to butter. Note that it’s wise to have a towel around for this step of the process to cover your mixer. Once the fat starts to separate, things get a little messy.
- Butter will form clumps and start to separate from the buttermilk.
- Strain the buttermilk from the butter, and put the buttermilk into an airtight container – it will stay good for about a week.
- Rinse the butter in ice-cold water until it runs clear. Then strain your butter through a cheesecloth, or a sturdy paper towel to be sure you’ve gotten rid of all of the moisture (additional moisture can cause mold).
- At this point, you can add salt, herbs, or other flavors to taste.
- Butter can be stored in the refrigerator for up to one month in an airtight container.
Can you make homemade butter without heavy cream?

Heavy cream has the best possible fat content to make butter from scratch. Unfortunately using a substitute like milk, or yogurt won’t get you the butter you’re used to.
The process of making butter is called churning, and it requires cream that has at least 30% milk fat.
So, if you want to make homemade butter, you need heavy cream!
Is making your butter at home cheaper than buying it at the store?

It can be! 32 fluid ounces of cream yields 1 pound of butter, and two cups of buttermilk. Depending on your area, you might save a little bit of money by opting for this DIY version.
How to make homemade butter spreadable?
My favorite trick for room temperature, spreadable butter is my butter bell!
A butter bell holds water in the bottom, and butter in the bell to form an air-tight seal, and keep butter fresh and soft at room temperature. It’s one of my favorite kitchen tools because it just requires switching out the water in your butter bell every 2-3 days.
And, if you know you might not use the butter out on the counter, you can still store it in the fridge, but it won’t be as soft and spreadable.
Recipe for homemade butter
Enjoy the recipe and some of my favorite recommendations below for amazing ways to use butter! Check out the video on my Instagram, @TheHangryWoman.
Print
Homemade Butter
- Total Time: 15 minutes
- Yield: 1 lb of butter, 2 cups buttermilk 1x
Description
I will walk you through the steps of making butter in a stand mixer with one ingredient. It’s easy and fun, and you will love the fresh taste of homemade butter!
Instructions
- Pour heavy cream into the bowl of a stand mixer.
- Turn the mixer on to medium speed and beat the cream until it thickens and forms peaks.
- Continue mixing on high speed until the mixture turns from whipped cream to butter.
- Butter will form clumps and start to separate from the buttermilk.
- Strain the buttermilk from the butter, and put the buttermilk into an airtight container – it will stay good for about a week.
- Rinse the butter in ice-cold water until it runs clear. Then strain your butter through a cheesecloth, or a sturdy paper towel to be sure you’ve gotten rid of all of the moisture (additional moisture can cause mold).
- At this point, you can add salt or other flavors to taste.
Equipment
 Buy Now →
 Notes
- Butter can be stored in the refrigerator for up to one month in an airtight container.
- It’s wise to have a towel around for this step of the process to cover your mixer. Once the fat starts to separate, things get a little messy.
- Prep Time: 0 minutes
- Cook Time: 15 minutes
- Category: Condiments and Sauces
- Method: Mixing
- Cuisine: American
Nutrition
- Serving Size: 1 tablespoon
- Calories: 100
- Sugar: 0.9g
- Sodium: 8mg
- Fat: 10.8g
- Saturated Fat: 6.9g
- Carbohydrates: 0.8g
- Cholesterol: 33.7mg


One Response
this is useful